How to Grow a Rose of Sharon |
Colorful, showy flowers appear in summer in shades of white, red, pink and purple on the rose of Sharon bush. Growing rose of Sharon is an easy and effective way to add long lasting summer color with little fuss. The large, showy flowers attract birds, butterflies and other useful pollinators.
How to Grow a Rose of Sharon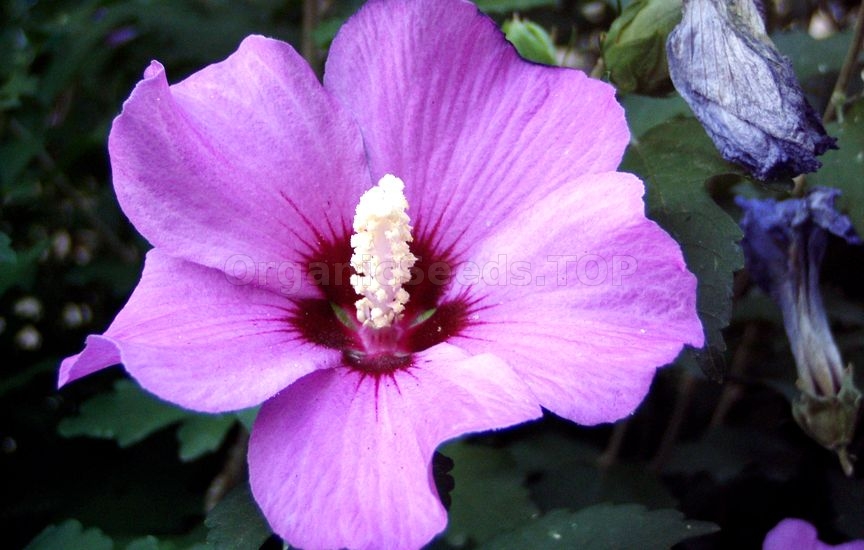 Care for rose of Sharon, botanically named Hibiscus syriacus, is minimal. After planting rose of Sharon, this attractive specimen may thrive with neglect. However, some care, especially pruning for shape, will likely be needed for this showy shrub to add value to your landscape display. Also known as shrub Althea, this 9- to 12-foot specimen is a native of eastern Asia that is well adapted to growing in most USDA plant hardiness zones. It often reaches a spread of 10 feet and can be used as part of a growing privacy border. When planting rose of Sharon in the landscape, consider that it may reseed abundantly. Prepare to remove additional plants appearing in unwanted areas. These can be relocated to a more desirable location or shared with friends. Shrub Althea is best planted into rich well-draining, slightly acidic soil in a full sun to part shade location. The rose of Sharon bush prefers moist, well-draining soil, although it will tolerate most soil conditions except those that are soggy or extremely dry. A top dressing of organic compost or mulch may benefit the rose of Sharon bush. Ongoing Care for Rose of Sharon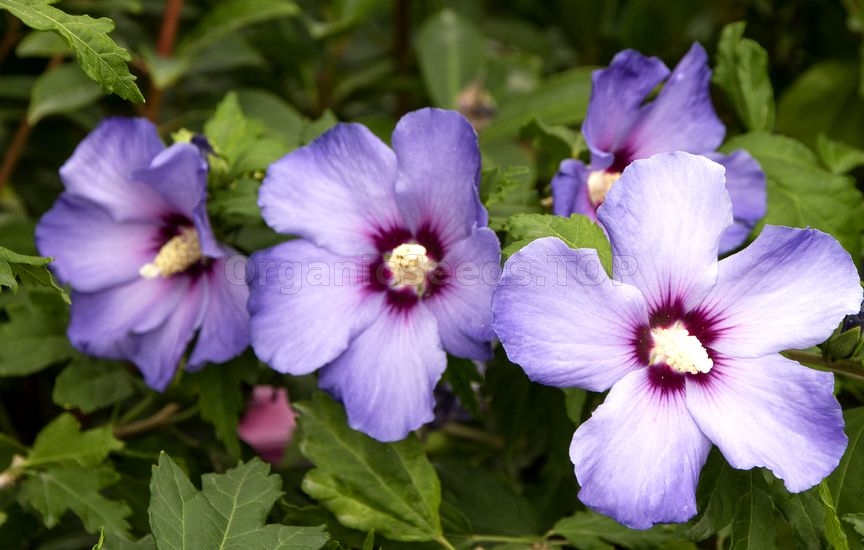 Bud drop can be a problem with growing rose of Sharon. This may be caused in part when the rose of Sharon bush is under stressful conditions, so try to keep the shrub as happy as possible. Too little water or too much fertilization may contribute to bud drop, which seems inherent to the rose of Sharon bush. Monitor conditions on growing rose of Sharon to be rewarded with a long season of large showy single or double blooms. Flowers grow on the current year’s growth; early pruning before buds develop can keep the growing rose of Sharon in top form and keep the tree-like shrub in bounds. A deciduous shrub, learning how to grow a rose of Sharon and keep it under control is best done with experimentation on your cultivar. Some have attractive drooping branches while others assume an upright form. Care for rose of Sharon can depend on the form taken by your specimen. Tips On Taking Cuttings From Rose Of Sharon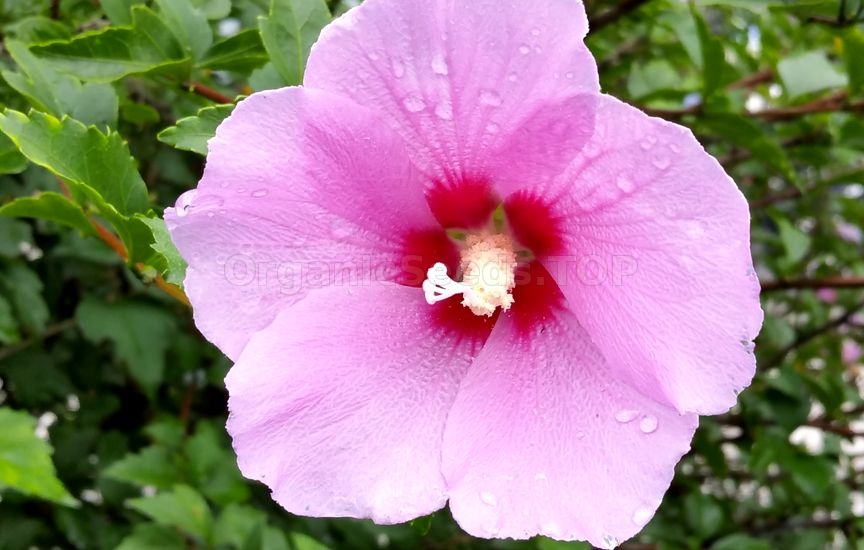 Rose of sharon is a beautiful hot weather flowering plant. In the wild, it grows from seed, but many hybrids grown today can’t produce seeds of their own. If you want another of your seedless bushes, or if you just don’t want to go through the ordeal of collecting seed, you’ll be happy to know that rooting rose of sharon cuttings is extremely easy. Keep reading to learn more about how to grow a rose of sharon bush from cuttings.
Taking Cuttings from Rose of Sharon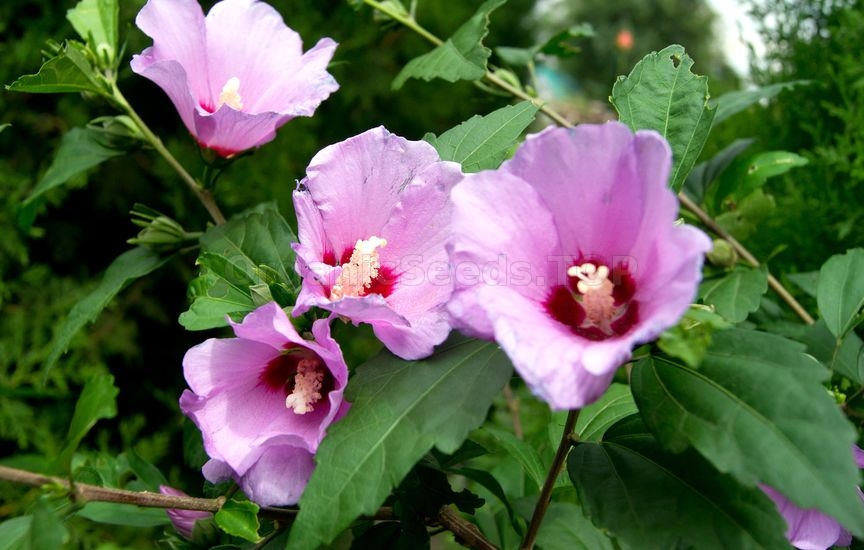 When to take rose of sharon cuttings is not complicated, as taking cuttings from rose of sharon bushes is easy and versatile. You can do it at almost any time of year and plant it in a few different ways. In early to midsummer, take green rose of sharon plant cuttings. This means you should cut the shoots from the bush that grew in spring. In late fall or even winter, take hardwood cuttings that have been on the bush for at least one season. Cut stems that are between 4 and 10 inches long and remove all but the top few leaves.
Planting Rose of Sharon Cuttings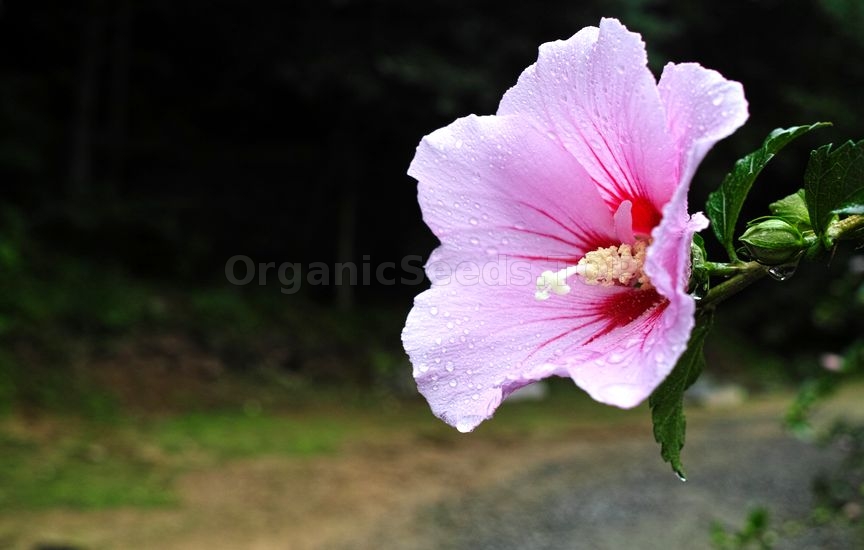 Rooting rose of sharon cuttings can be done in a couple ways as well. First of all, you can dip your cutting (the bottom end with the leaves removed) in a rooting hormone and stick it into a pot of soilless mix (Don’t use plain potting soil – it’s not sterile and could open your cutting up to infection).
Eventually, roots and new foliage should start to grow. Alternatively, you can place your rose of sharon plant cuttings straight into the ground in the spot of your choice. You should really only do this in the summer. The plant may be in a little more danger, but you won’t have to transplant it later on. If you plant a few cuttings this way, you’re bound to have success. How To Transplant Rose Of Sharon Shrubs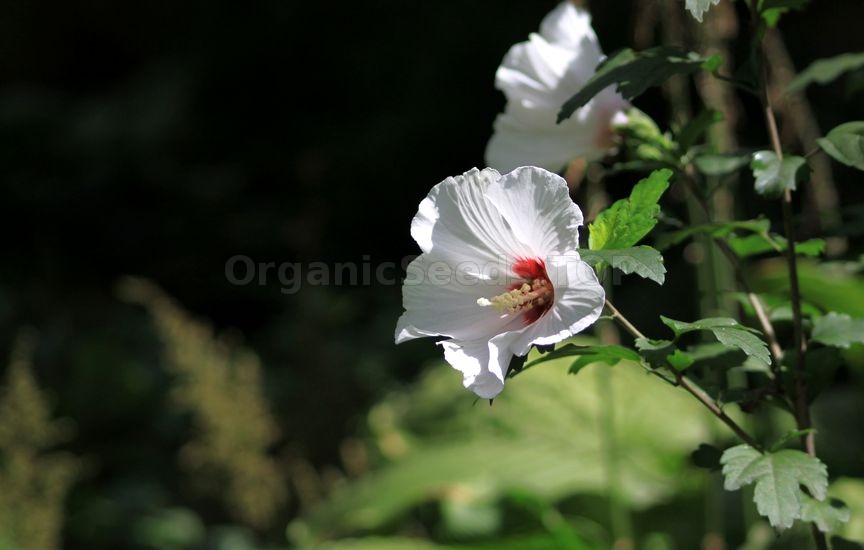 The bush blossoms in summer, when only a few other shrubs flower. With a stiff, upright habit and open branches, Rose of Sharon works in both informal and formal garden arrangements. Transplanting a rose of Sharon shrub is not difficult. Read on for tips on how and when to transplant rose of Sharon.
Moving Rose of Sharons You may decide that moving rose of Sharons is the best idea if you find that they are planted in shade or in an inconvenient location. Rose of Sharon transplanting is most successful if you undertake the task at the optimal time. When to transplant rose of Sharon? Not in summer or winter. Your plants will be stressed if you try to transplant them when the weather is too hot or cold. Moving rose of Sharon bushes at these times can kill them. If you want to know when to transplant rose of Sharon, the best time to do it is while the shrubs are dormant. This is generally November through March. It stresses a plant to move it during the growing season and it will take longer to establish in the new location. It is best to plan on transplanting a rose of Sharon shrub in autumn. Moving the shrubs in the fall gives them all winter and spring to establish a strong root system before their flowering period. It is also possible to transplant in spring. How to Transplant Rose of Sharon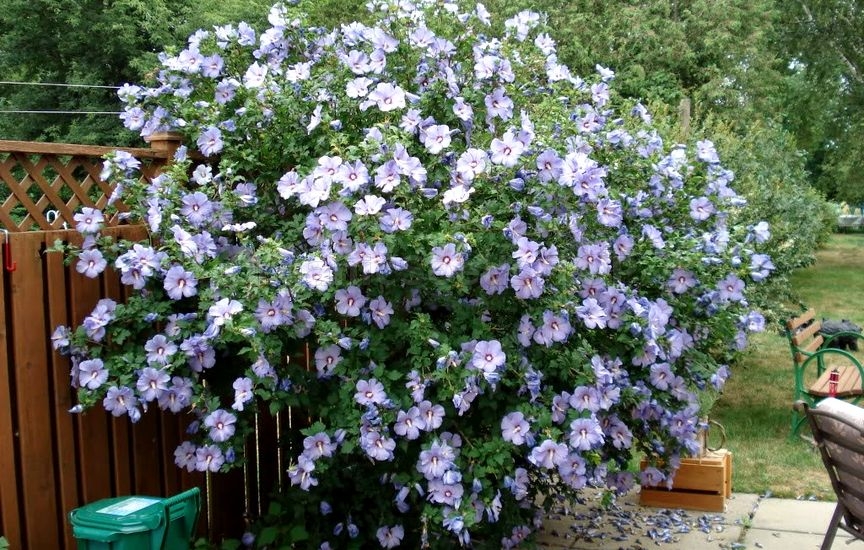 When you are transplanting a rose of Sharon, preparation of the new site is important. Remove all of the grass and weeds from the new planting location, and amend the soil with organic compost. You can do this toward summer’s end. When you are done preparing the soil, dig a planting hole. Make it twice as big as you expect the shrub’s root ball to be. In November, it is rose of Sharon transplanting time. If the plant is very big, trim it back to make transplanting a rose of Sharon easier. You can also tie up the lower branches if you are afraid you will injure them. Gently dig around the plant’s roots and try to keep as many of them as you can in the root ball. Lift out the root ball carefully. Place the plant in its new planting hole so that it is sitting at the same depth as it was in the prior planting location. Pat extracted earth around the sides of the root ball, then water well. You may need:«Rose of Sharon» - Organic Purple Hibiscus Seeds«Rose of Sharon» - Organic White Hibiscus Seeds |
|
|